Chroma key for videos and live streams: all you need to know
Learn how to use Hollywood’s green screen in your video strategy.

What will we see in this post
You’ve certainly watched a Hollywood movie with scenes in places that don’t exist in real life, or places in which it would be too difficult to shoot, such as the top of Mount Everest.
You can bet that they used chroma key, also known a green screen and other variations of this sort, since the screen color mostly used in this technique is green.
Any idea why they use the green color? You might want to apply this technique to your videos so it’s a good idea to learn how to do it!
This article is a continuation of the article on how to setup a home video-recording studio. In it, I told you that:
“During editing, you can replace the green color with any image you wish. The problem is that it’s an advanced video technique, which makes it difficult to obtain good results. Therefore, only use it if you really know what you’re doing.”
Now, the time has come for you to really know what you need in order to create incredible videos that will impress your audience!
What is chroma key?
This is a video technique in which all pixels of a specific color on the video are made transparent.
So, if you shoot a screen of a specific color, any color, with someone standing in front of this screen, you’ll be able to perfectly “crop” this person on the image and the rest will be made transparent and ready to have another image inserted in the background.


It’s hard work, but the end result speaks for itself
Well, but your screen isn’t green!
As I told you above, you will choose a color to replace all pixels with the same color, with transparent pixels.
If the person you wish to preserve in the image is wearing clothing that is the same color as the background, their clothing will also become invisible, which will look like a floating head with arms on your video.
This is why it’s important to select a color that won’t be present anywhere in your image. And this is also why neon green and blue are more popular, but you can use any color you want.
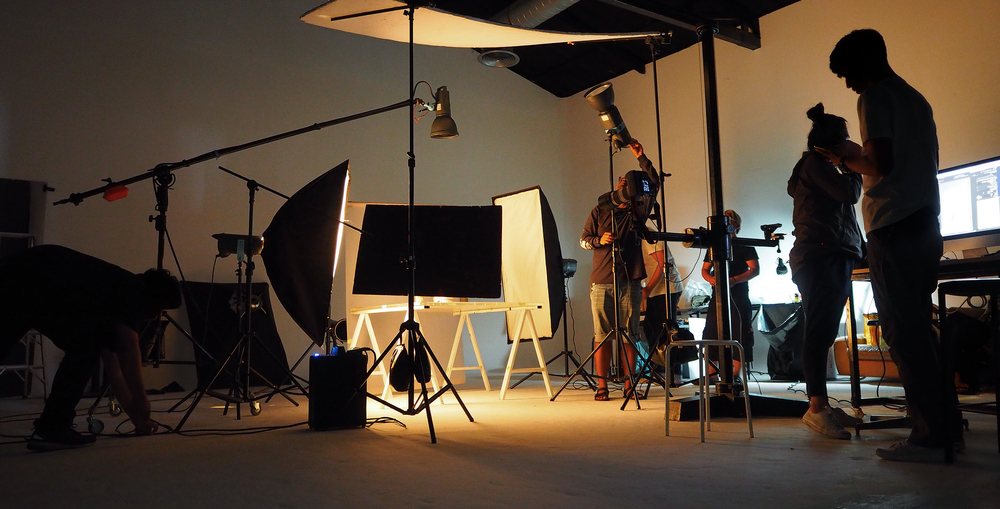
Getting ready for the recording
This is the hardest part when you use chroma key. But if you get everything right, your life during editing will be easier.
So, let’s get to it. You will mainly have to pay attention to the following:
Light your color screen uniformly, since brightness directly interferes with the color captured by your camera.
If parts of your screen are too bright or dark, this could give you trouble later.
Uniform lighting is essential for correct chroma key.
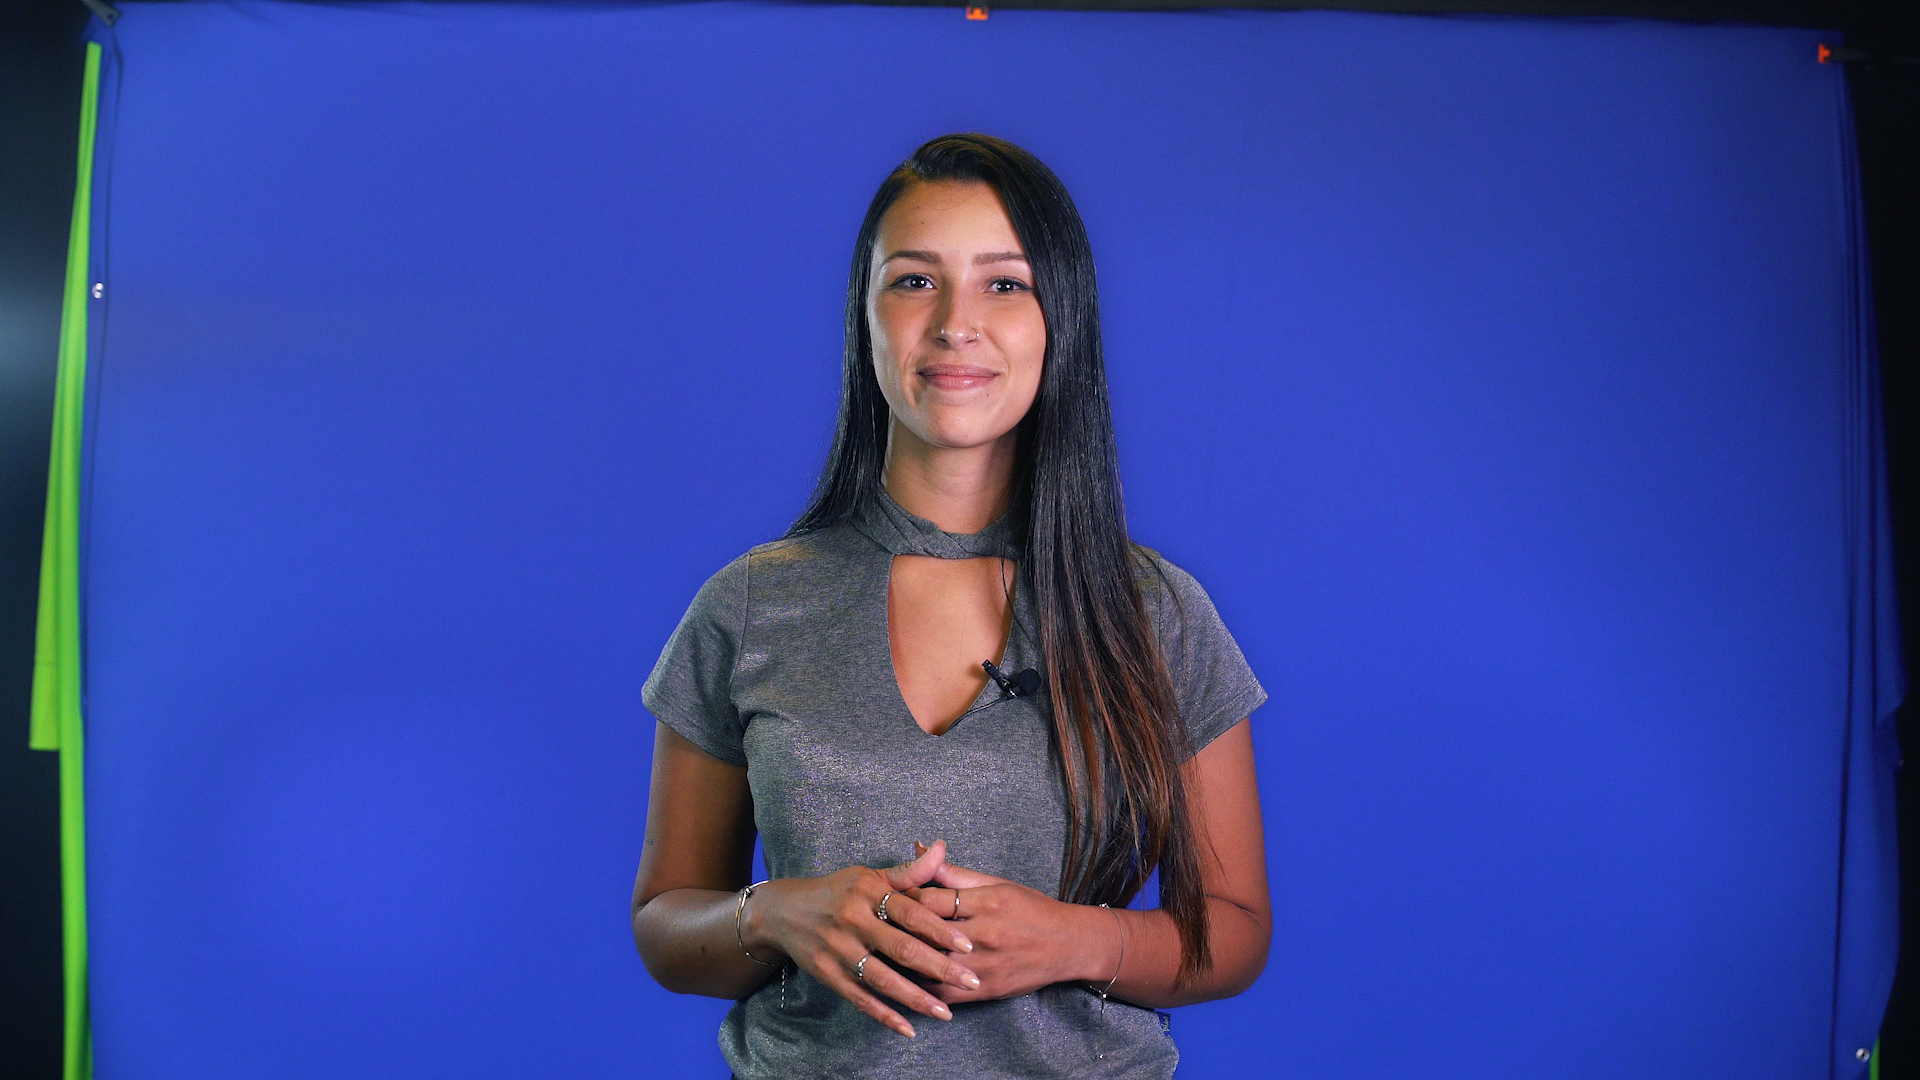
Keep your video presenter as far from the screen as possible. This way, the lights you use to light the screen won’t reflect its color on your presenter.
This makes cropping extremely difficult since the color you wish to make transparent is all over the presenter.

Pay attention to the hair. How it received too much light reflected from the screen, the chroma key “cut off” a piece of it.
Avoid wrinkles and irregularities on your screen. This way it’s easier to obtain a consistent and uniform color all over your screen without too many dark parts.
With advanced chroma key settings, you can save a recording like this, but it’s always better to get everything right during shooting.
Make sure that the screen is always directly behind your presenter. This will be a huge problem if the presenter moves his arms too much or steps away from the front of the screen.
You will need two distinct sets of lights, one to light your screen and one for your presenter, since the lights on the screen will be behind the presenter.
In order to light the individual, you can use normal 3-point lighting, which will work perfectly.
One set of lights on the screen and the other on the presenter. The two apart are not enough.
And most important of all! Perform tests before shooting the entire video and uploading it on your computer, and then try to remove the background screen.
Record one clip at a time. They can be short. And then import them into your editing software to refine your chroma key.
If you have too much trouble achieving good results, change your lighting and your set, and then try again. This way you ensure the best result possible when it’s time to do the actual shoot.
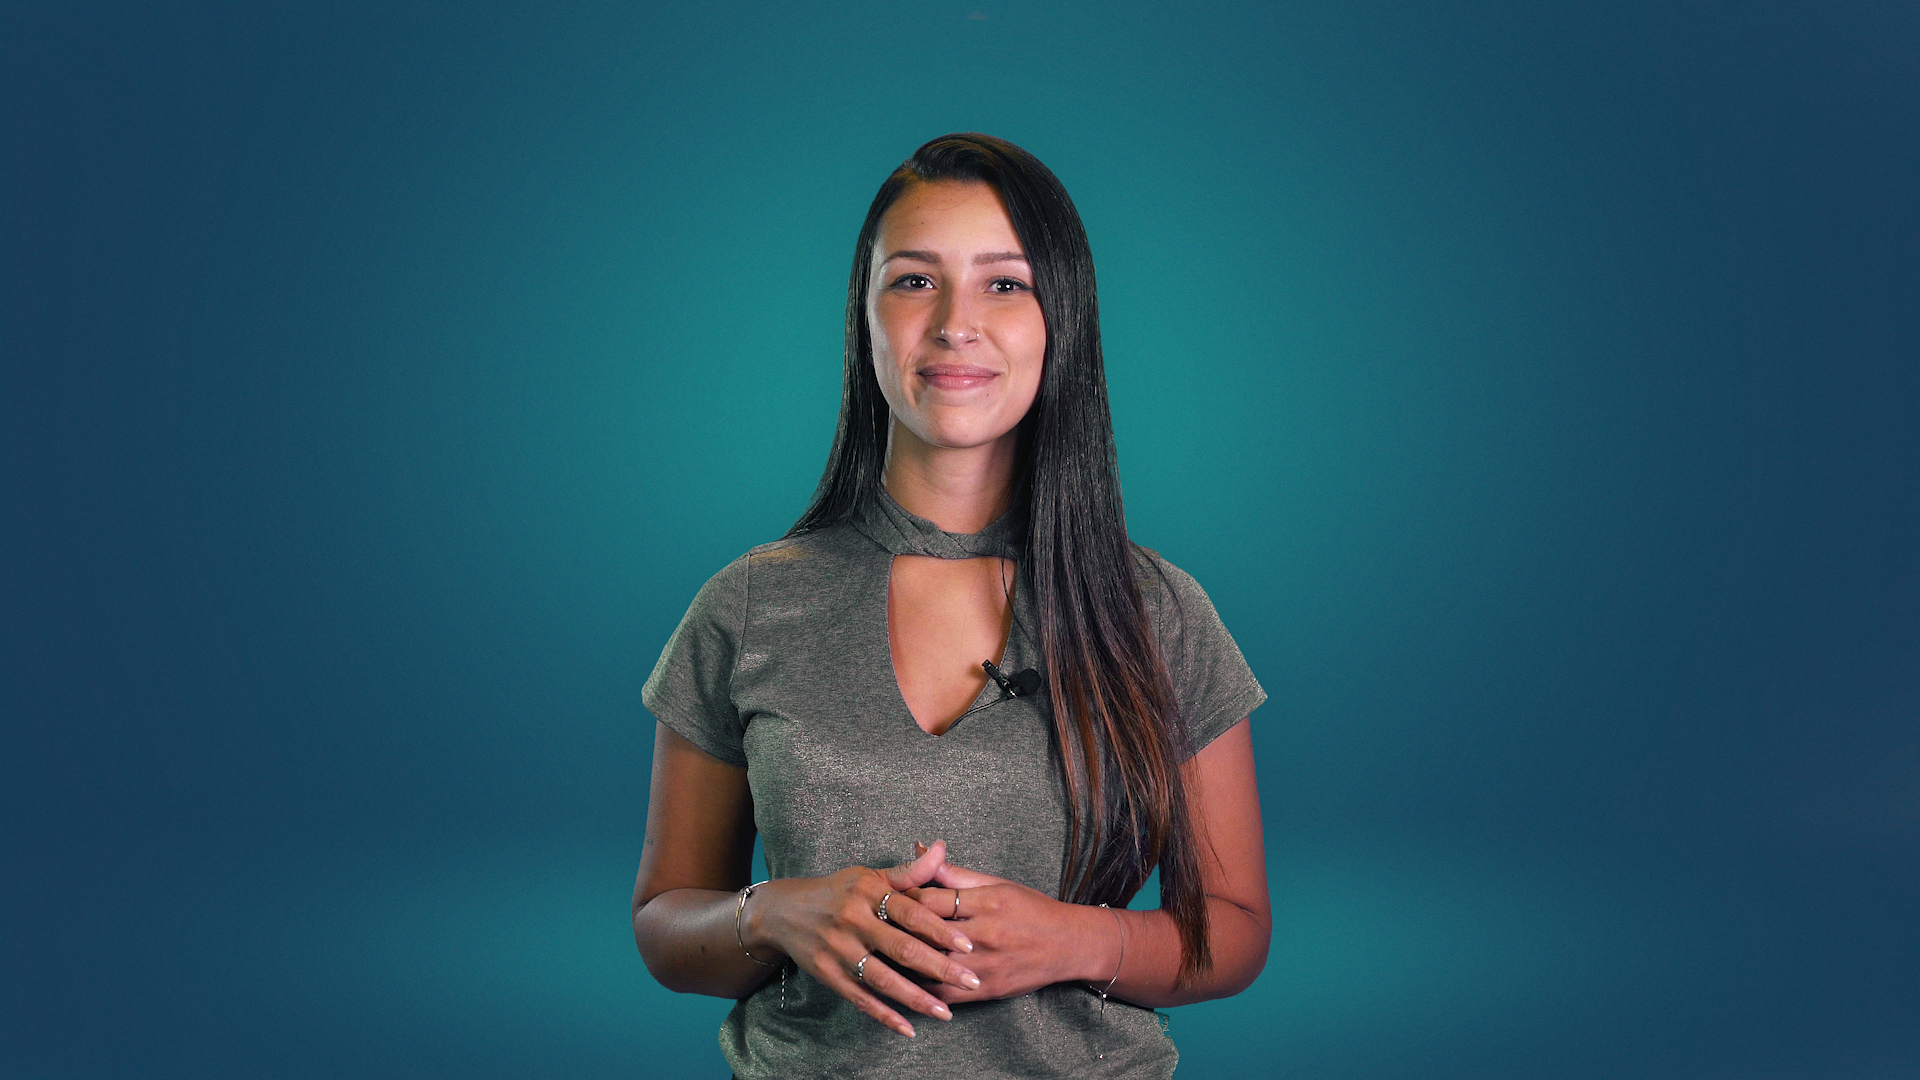
After a bit of practice and testing, you can achieve incredible results.
This process can be quite hard the first time you try it out, but as I mentioned in the other article about studios, if you keep everything in the same place, or at least mark out the positions in order to put everything back in the same place, you have a good chance of achieving excellent results on the first try every time.
Chroma key in Shotcut
Personally, I use Adobe Premiere as my “go-to” editing software at work here at Hotmart, but I’ll teach you to use Shotcut, because it’s free, open source and multiplatform (Windows, Mac and Linux), and because we’ve already taught you here how to use it to edit a video from start to finish.
Don’t worry if you use any other software, chroma key principles are the same for all of them.
You might find settings that are more or less advanced in your software, but if you shot your chroma key perfectly, you won’t need to delve deeper into them.
It’s worth remembering here that the chroma key compositing process can be quite heavy for your computer. I recommend that you leave this step for last when you edit your video, so that you only have to deal with this slowness at the end of the process.
So, let’s get started.
1. After loading Shotcut and importing your video and your new chosen background, we’ll need two video tracks.
Thus, you insert your film on the top track and your new background on the bottom track, and both will be played simultaneously.
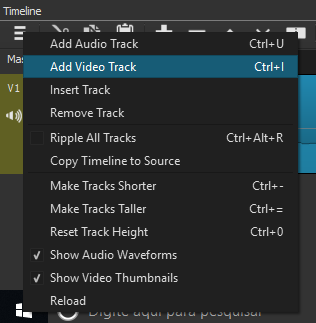
To do so, click on the button with three lines on the top left corner of the timeline and select Add video track or use the Ctrl+i shortcut in Windows and Command+i on the Mac.
Now, align them on the timeline.
Make sure that your video or image that will be used to replace your chroma key background is the same length or longer than your video, so that you don’t end up with a black background in the middle of your video.


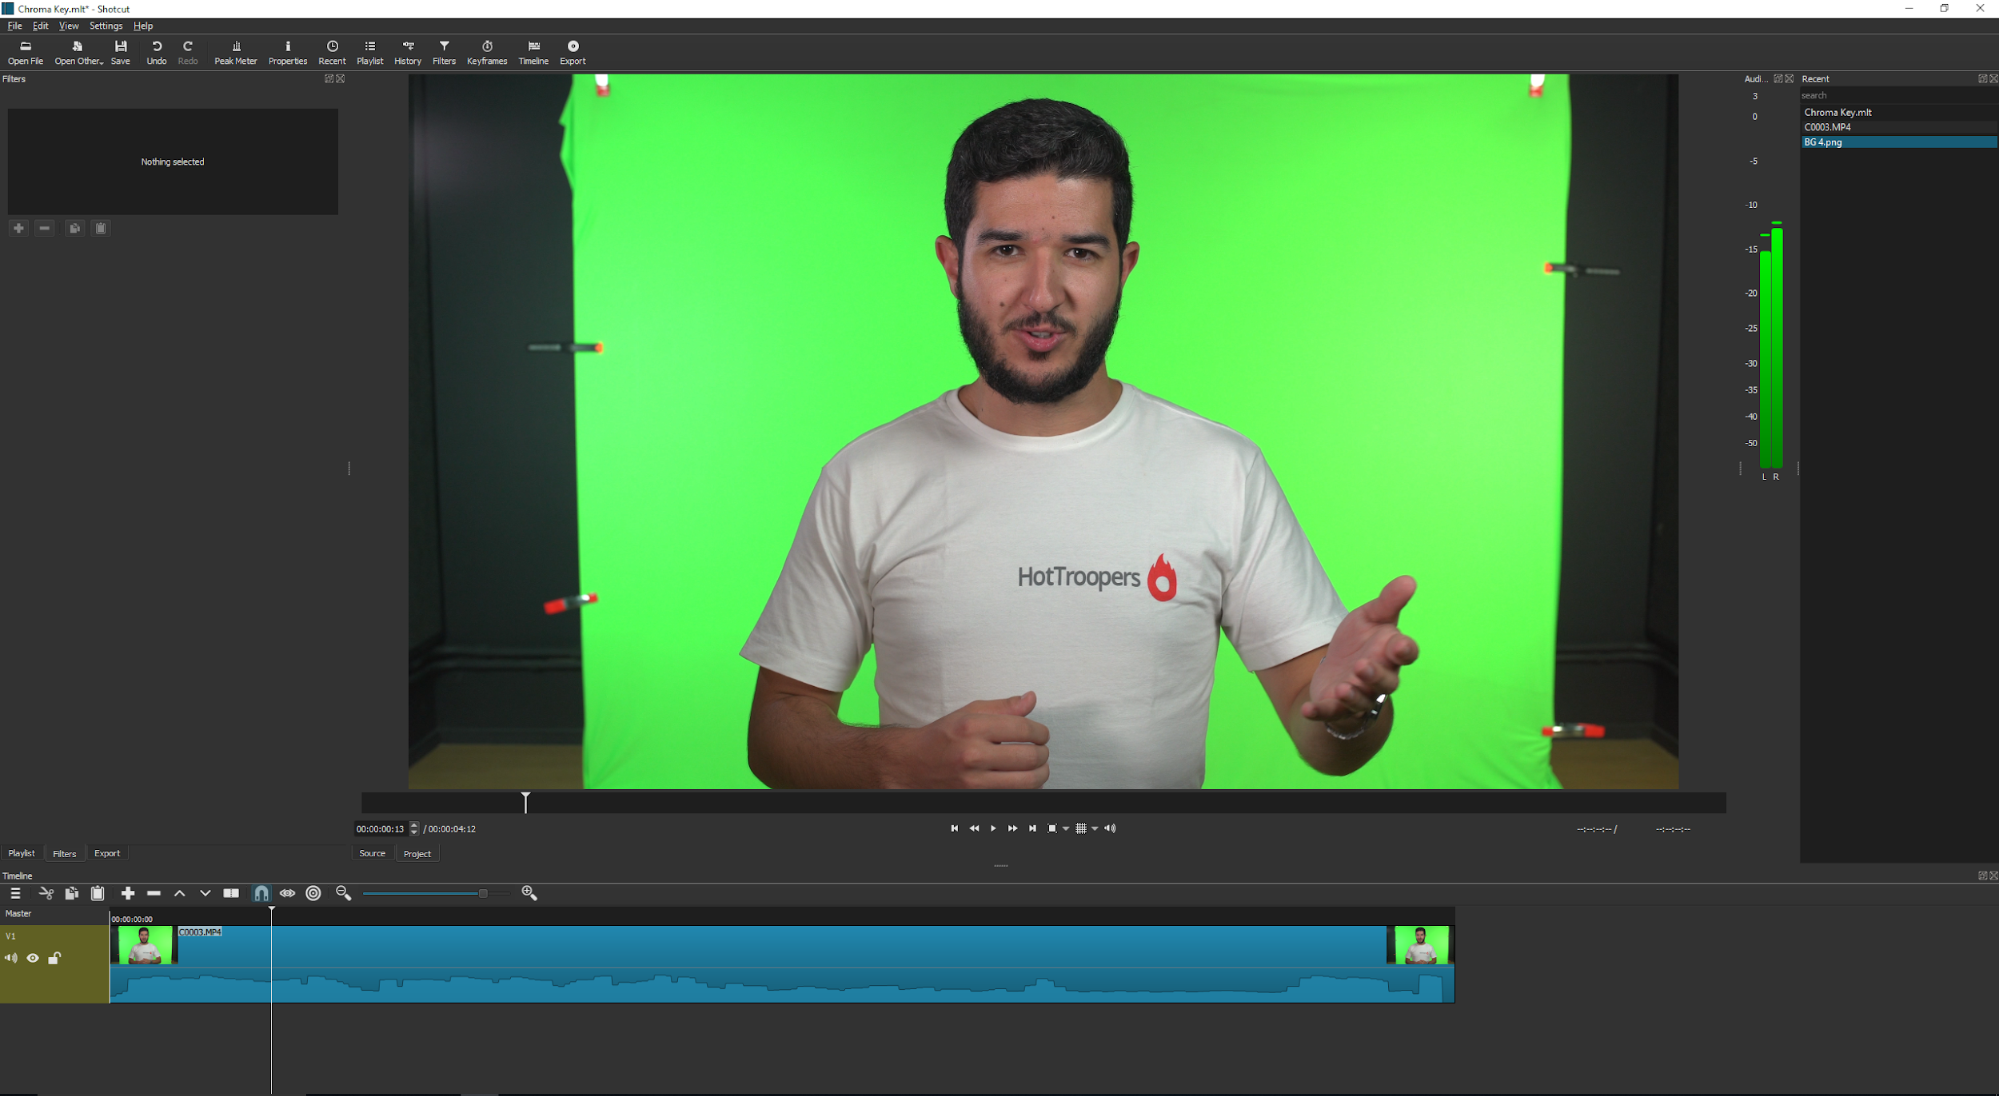
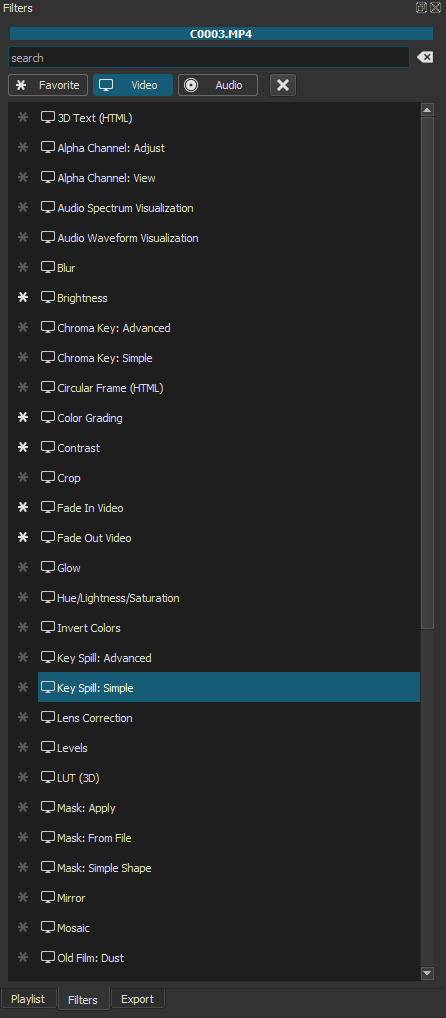
2. With the video you recorded selected, in the Filters window click on ‘+’ to add a new effect.
Select the video effect tab and select the Chroma Key: Simple effect.
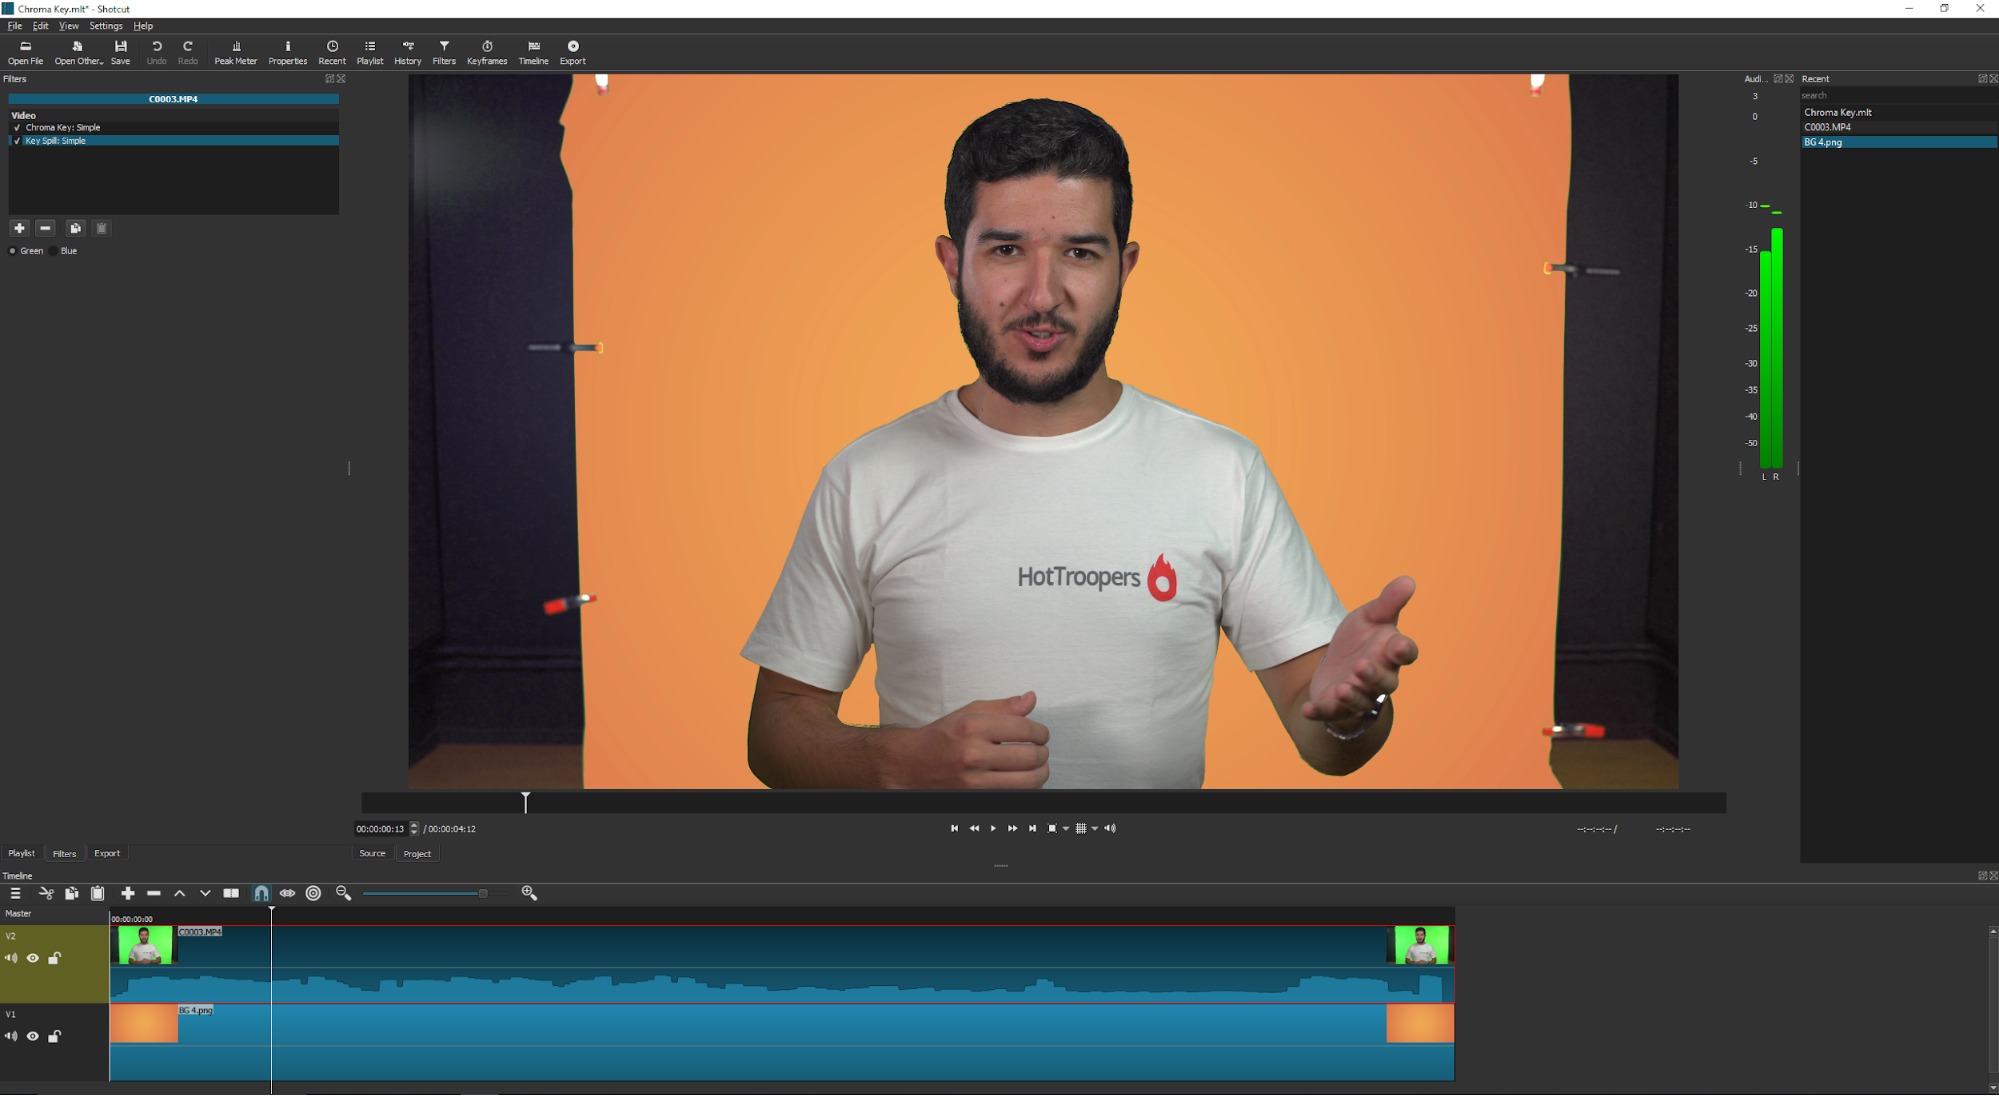
In it, you will click on the eyedropper icon and then on your video at the point as near as possible to your presenter in order to ensure the best results.
If you get a weird result, select another point on your background screen. Try at different points until you achieve a satisfactory result.
Once you find the best point on the image to apply the eyedropper tool, use the Distance parameter to try to make your screen completely transparent, and your presenter completely visible.
3. To eliminate your screens color borders from around your presenter, the so-called spill, we’re going to use the Key Spill: Simple effect. In it, you only need to inform the color of your screen and it will handle everything else.
In order for this effect to work, you must use a blue or green screen for your chroma key. If you use any other screen color, or you don’t achieve the desired results with the simple version of this effect, I recommend the Key Spill: Advanced version. Unfortunately, I won’t be able to go into detail about it in this article, in order to maintain objectivity.
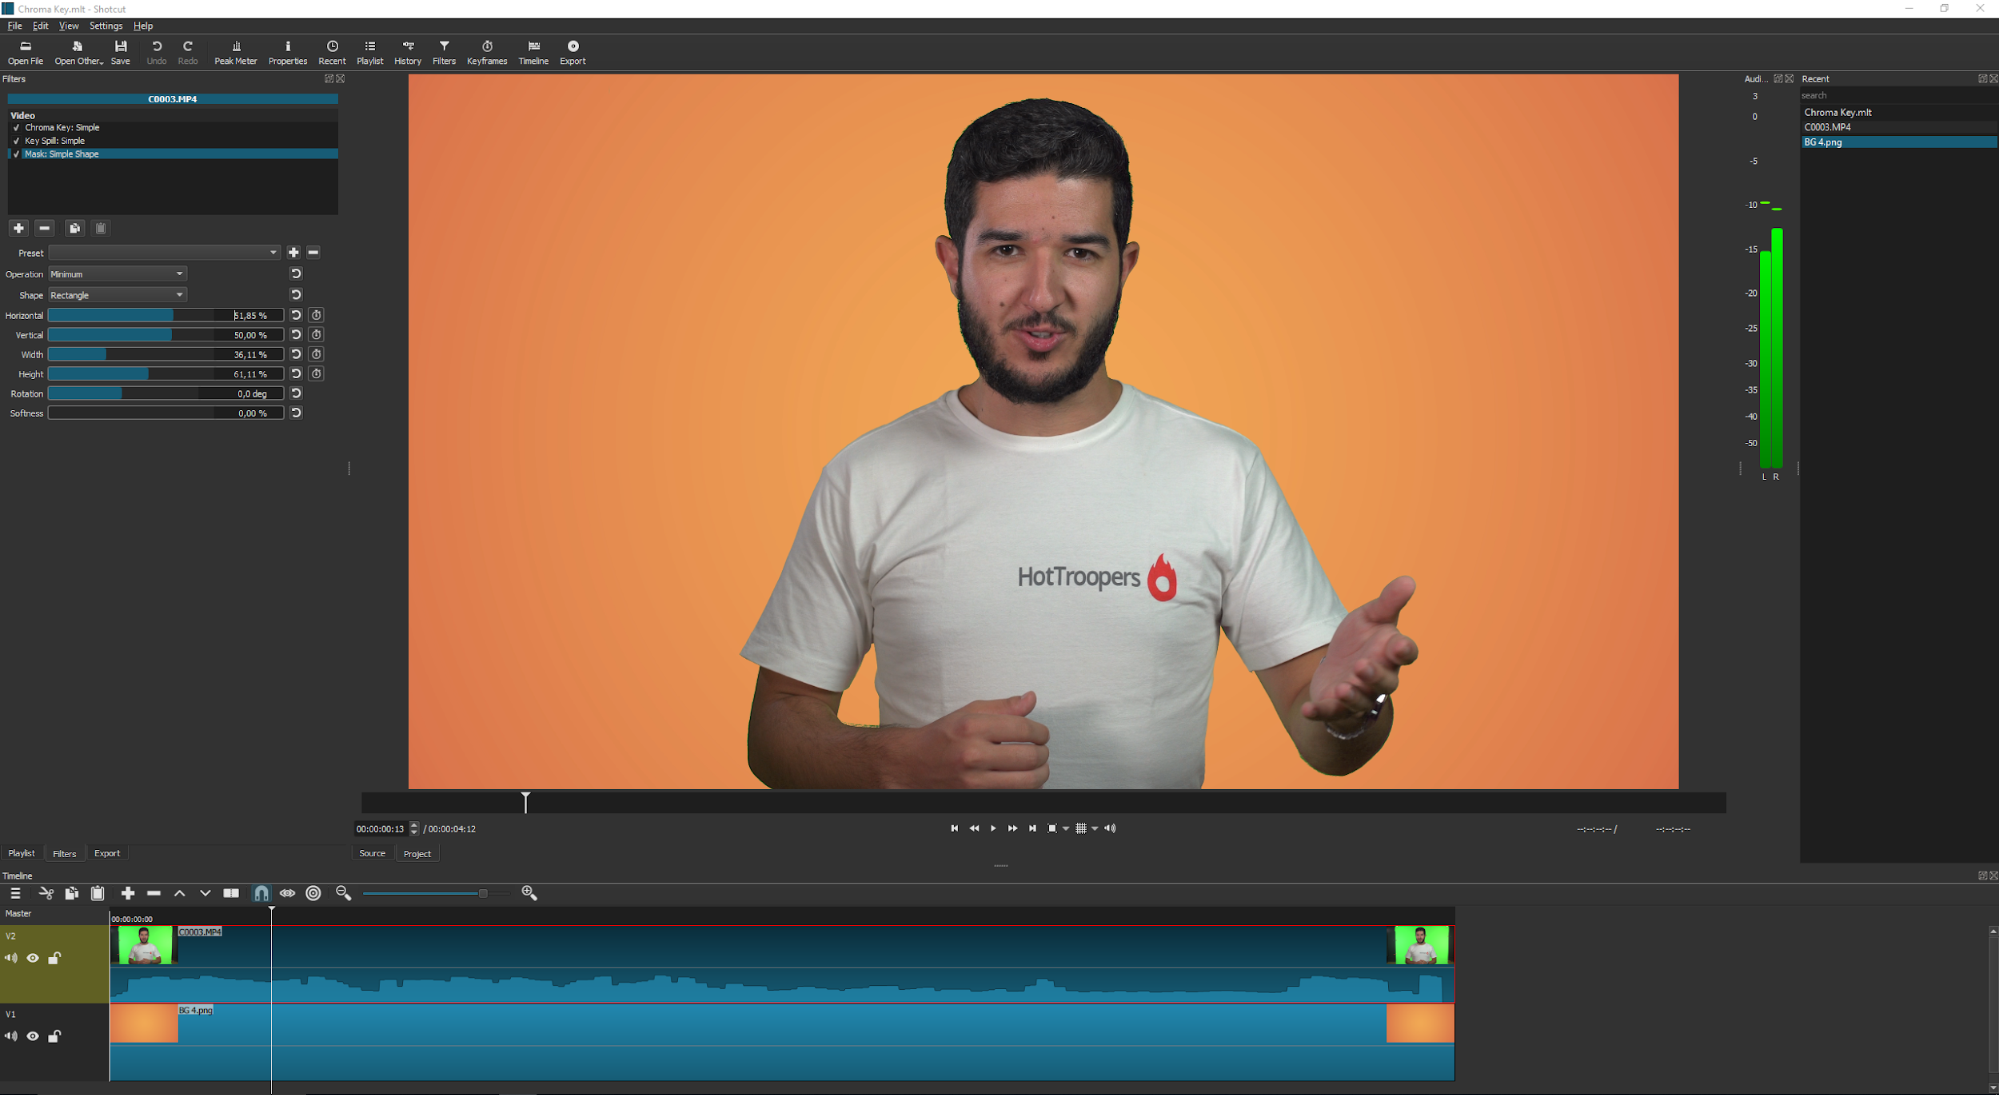
4. Finally, we’re going to use a mask to eliminate the space outside of your green screen from your scene, in case it’s not large enough to fill the entire frame of your image.
To do so, we apply the Mask: Simple Shape effect. In the Operation menu, you will choose the Minimum mode and then, in the shape menu, choose the best option for your specific case. In my case, a simple rectangle handled it.
Use this effect’s parameters to form the shape you want.
The Softness parameter defines the softness of your shape’s border, allowing you to make it sharp or blurred to better assimilate to the scene in certain cases.
After this effect is applied, watch your video and make sure that your presenter doesn’t move outside the shape at any time. If he does, you’ll need to adjust your mask.
Chroma Key for live streams using OBS
We’ve taught you here how to use OBS, which is a free live-streaming, open source and multiplatform program, and is widely used by professional streamers due to its robustness. Therefore, we’ll also use it here.
1. With OBS loaded, its streaming parameters configured and its elements already displayed on your scene in the program, we’re going to import your webcam.
In the “Sources” window, click on the ‘+’ on the lower right corner and select the “Video Capture Device” option.

2. You will add a filter to your webcam. Right click on the webcam’s image or on the item in the “Sources” section, and select the “Filters” option”.
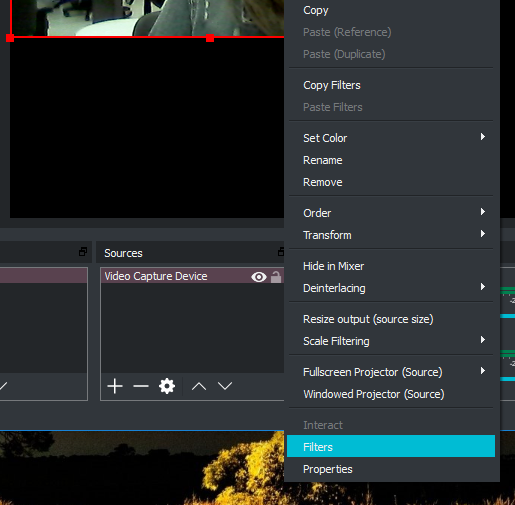
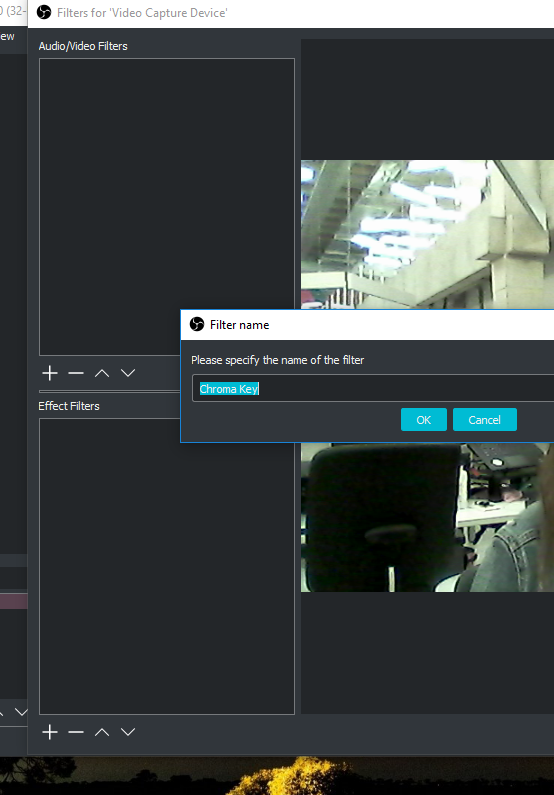
3. The first filter that we’re going to add by clicking on the ‘+’ on the lower left corner, is the Chroma Key filter.
Choose the filter’s name, in case you prefer another one to facilitate browsing.
OBS does a great job of automatically replacing your background screen if you did a good job with your set.
You can also adjust the effect’s parameters to improve cropping.
The parts of your video that will be transparent during your live stream are the gray parts.
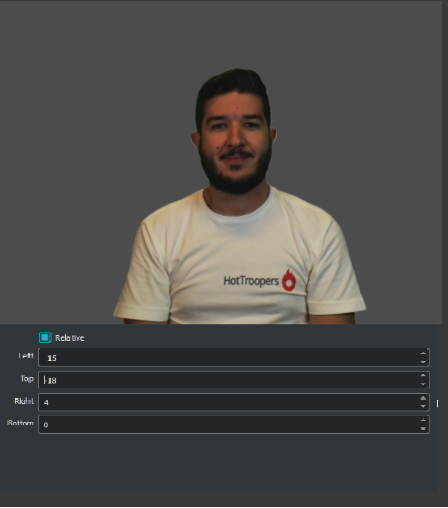
4. The second filter we’re going to apply is the “Crop/Pad” filter, if your screen doesn’t fill your entire frame, as is the case of our image here.
Make sure that the “Relative” option is checked and experiment with the values until you obtain the crop that allows the most room for gestures, but only expose the parts where the background is visible.
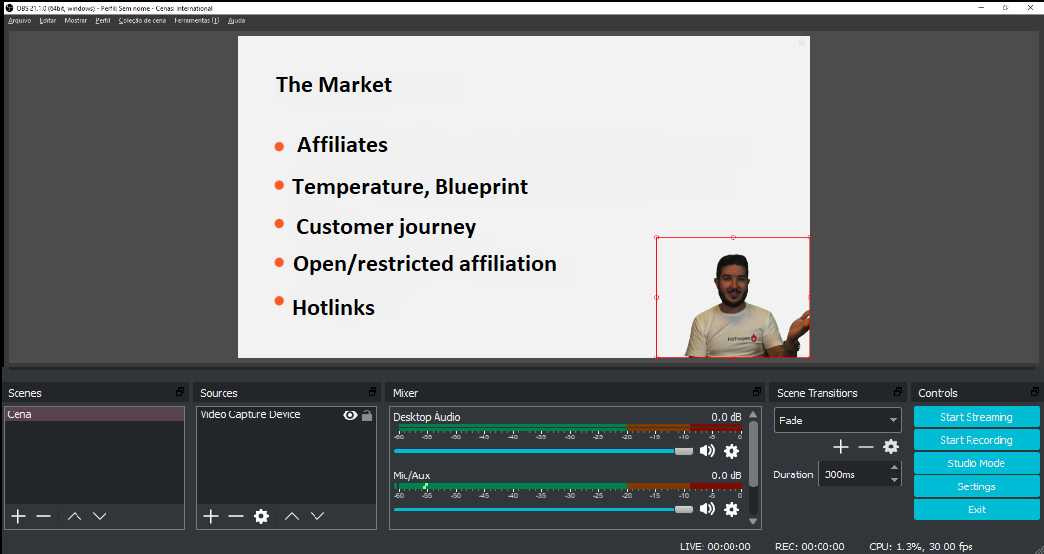
5. Now, adjust your webcam’s image size in your broadcast and you’re ready to go!
Phew!
Now that you’ve finished editing your incredible video and have made your live streams with chroma key, it’s time to understand the best ways to make money with your content.
We tell you everything you need to know in our article on how to generate revenue with videos on the internet, besides on YouTube.